We all know that hybrid work is a dream for those who prefer working from home. But it’s also true that many people take the ‘work from anywhere’ approach — using the extra location autonomy to find time to travel, meet clients at trendy coworking spots, find new cafes to perch with their laptop and some iced coffee, and more.
In fact, there’s a whole term dedicated to this phenomenon, and it’s called ‘bleisure,” which, cleverly, means mixing business with leisure time.
We think this is great, especially since studies show that the hybrid model increases employee happiness. But it requires some responsibility to ensure everyone’s making their deadlines before tearing off their suits and hitting the beach.
How can we balance work-from-anywhere with making sure work gets done? It really boils down to time management! So, before you zoom off and book your next trip, consider this handy dandy tip to keep you on track: adding travel time to Google Calendar so you can plan ahead effectively and get all your work done before play!
What is travel time?
Before we get into discussing how to add travel time to Google Calendar, let’s clear up a definition first. What exactly is travel time?
Travel time is the amount of time you spend traveling from one destination to another. You can add this to any Google Calendar event manually, or with Clockwise, which handles it for you automatically.
Now, don’t underestimate the power of this humble metric. The truth is, the time it takes to get to (and from) an event can be a significant chunk of your day, especially if you live in a traffic-heavy city. Factoring it in is just as important as any event you add to your schedule.
Here are a few more reasons travel time is key!
The benefits of using travel time
Travel time, Google Calendar’s underutilized tool, is great for several reasons:
- It lets your team know when you’re away.
Adding travel time into your event details will mitigate any confusion among your team about when you’ll be away from your keyboard. As we just mentioned, the amount of time it takes to travel is just as important as the time that you’ll be away from your computer since that’s a period of time that you’ll also be unavailable. It might seem insignificant, but even half an hour during your working hours can reduce getting side-tracked by last-minute requests as you’re trying to leave your (home) office.
- No more worrying about being late.
By adding the travel time to your Google Calendar event, you can see the exact time you need to leave to reach your appointment or destination on time. How many times have you gotten sucked into your work and didn’t realize how much time has gone by? It also helps you avoid underestimating the amount of time it’ll take to reach your destination. With travel time, you can either get a pop-up notification on your phone or receive a Gmail reminder about what time you need to leave based on real-time traffic updates from Google Maps.
- It sets realistic expectations for yourself.
By knowing the precise time you have to leave, you can set realistic expectations about how much work you can get done before leaving the office (or home office). It can be easy to put off leaving to cram in some extra work without that tangible reminder in your Google Calendar.
2 ways to schedule add travel time to Google Calendar
Now that you’re familiar with what travel time is and how it works, let’s go through an easy tutorial on how to add travel time to Google Calendar. You can choose from two ways:
- Use Clockwise, which uses machine learning to recognize when a meeting has an external location, then automatically blocks the right amount of travel time in your schedule.
- Add travel time to your calendar manually each time you create a new event.
How to schedule travel time automatically
Clockwise is a free time orchestration platform that can help you make the most out of your schedule by using travel time! We’re all about protecting your time and helping you work smarter, not harder.
Clockwise uses machine learning to…
- Track which of your scheduled meetings require travel
- Automatically include travel time on your calendar
- Reserve a predetermined amount of time on your calendar so you can always plan ahead with accuracy
Not to mention, Clockwise mitigates schedule conflicts by automatically rescheduling meetings or appointments that conflict with your travel time.
Get started with Clockwise for free!

To get started with Clockwise’s automatic travel time feature…
1. Click here to create your free account. In the web app, click on Your ideal day in the main menu, or click here.

2. Scroll down until you reach the Travel Time section, pictured below. Click the toggle to enable travel time. Input your usual work location (e.g. your home address or your office address).

You’re all set! With travel time enabled in Clockwise, you don’t have to worry about blocking off extra time ever again.
How to add travel time to Google Calendar
Next, let’s go over how to add travel time manually. Google Calendar’s built-in travel time feature works by syncing up with Google Maps. With this option, Google calculates drive time based on real-time traffic updates and the time that you want to reach your destination.
Step 1: Create a new event
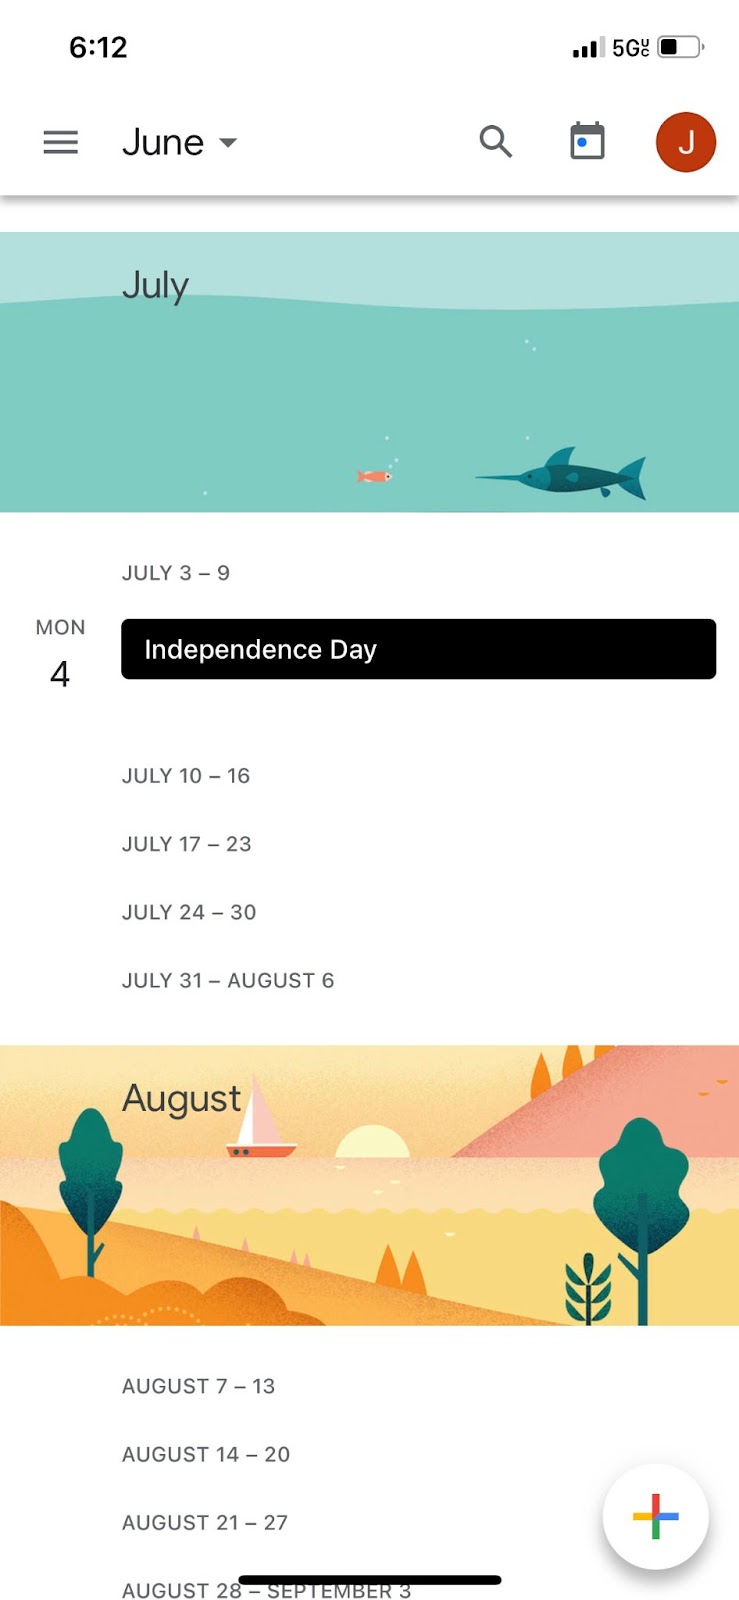
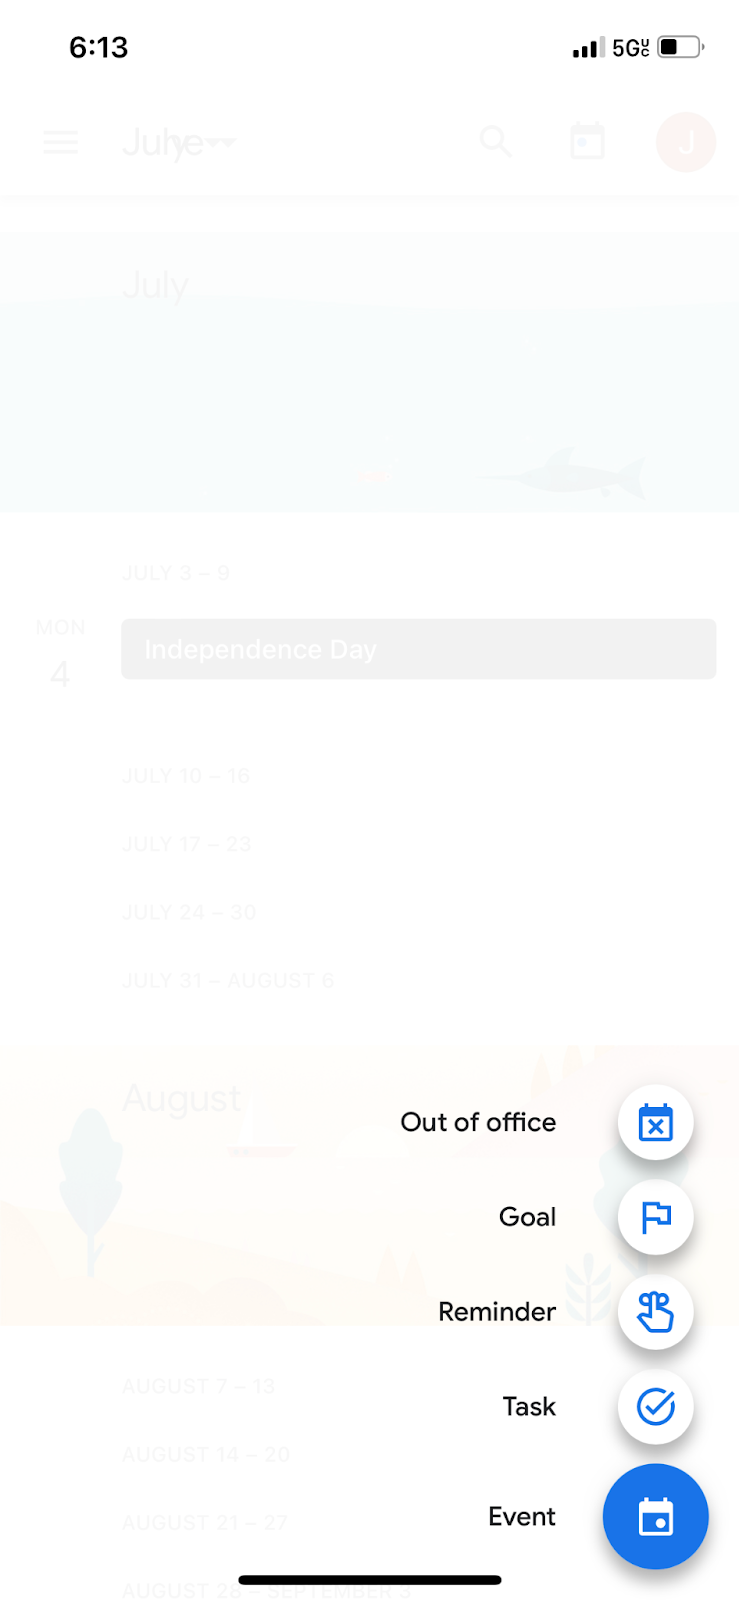
When you open Google Calendar on the desktop, you can create a new event simply by clicking on the day the event is. If you’re creating a new event on the Google Calendar app on your iPhone or Android, click the colorful plus (+) button in the bottom right-hand corner of your screen and select Event.
Step 2: Fill in your event’s location
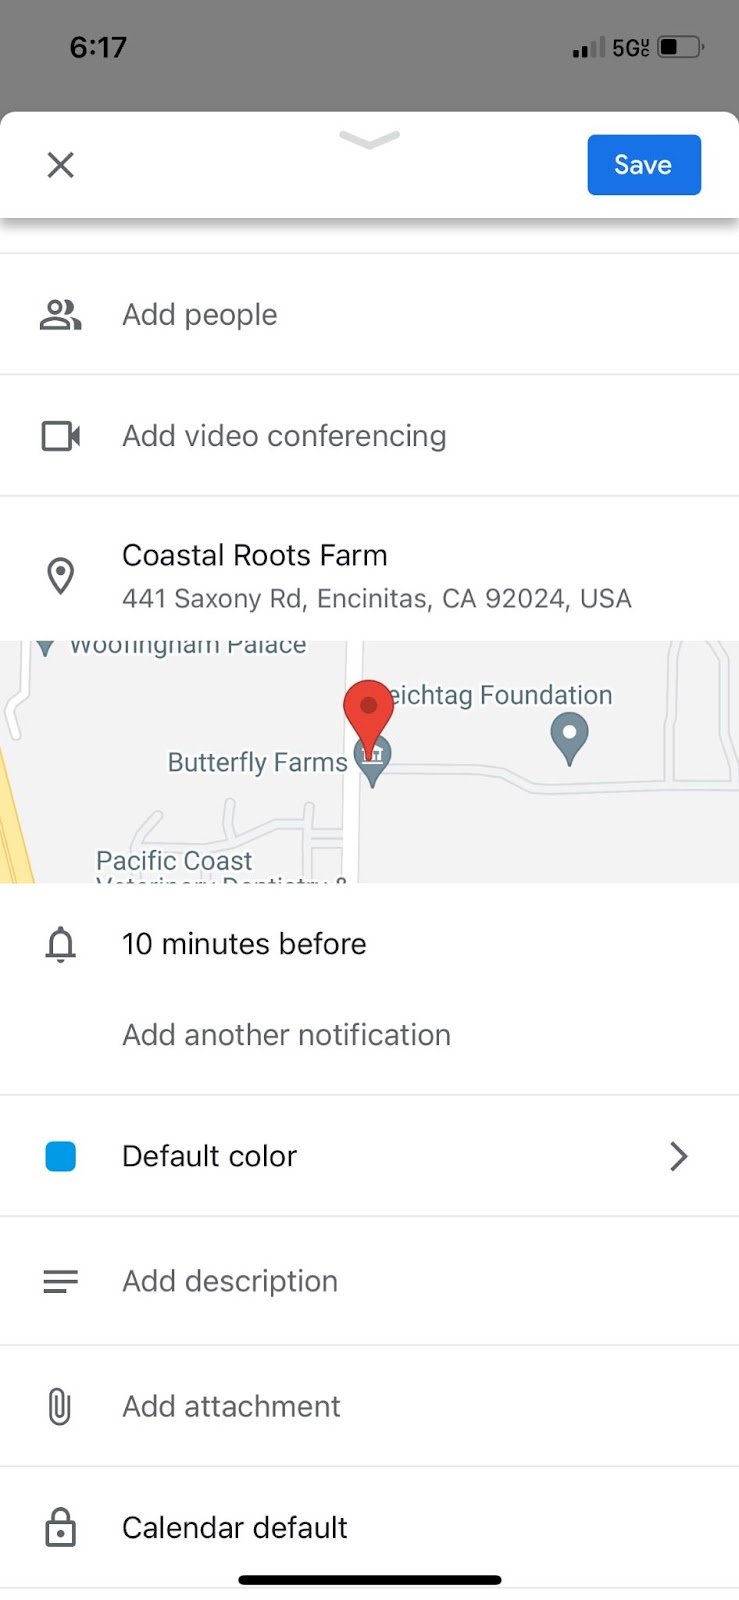
No matter if you’re using iOS, Android, or other desktop browsers like Google Chrome, the process is the same. When filling in your event details, you’ll come across the option to put in your event’s location. Fill that in (for example, with your work address or address of meeting spot) and click save.
Here are two important things to keep in mind as you go through this step:
- Include the start time of your event. You can save your event’s details both on your personal calendar and your work calendar (or your Google Workspace) so that your coworkers can see the information too.
- Be sure your location permissions are on so that Google’s travel time functionality can calculate the best time to leave.
Step 3: Choose your route

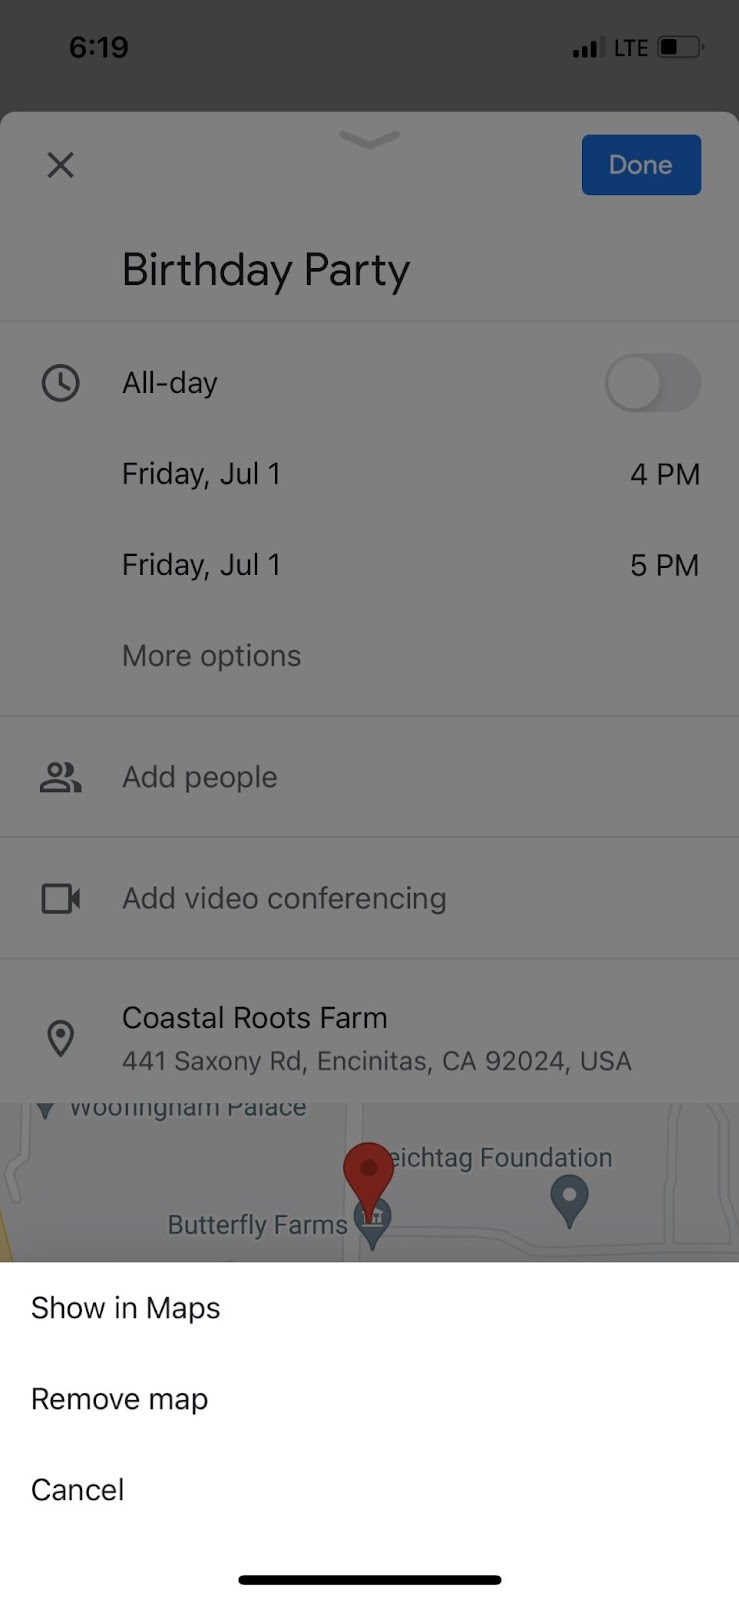
Next, click the pencil button to edit your day event, click the map icon next to your event’s location. Google Calendar should pull up Google Maps on the sidebar.
Google Maps will likely offer you several routes to choose from, including different methods of transportation such as public transportation. You can click on the blue button that says Directions on your preferred route, and then Add to Calendar.
Step 4: Set your notification (optional)
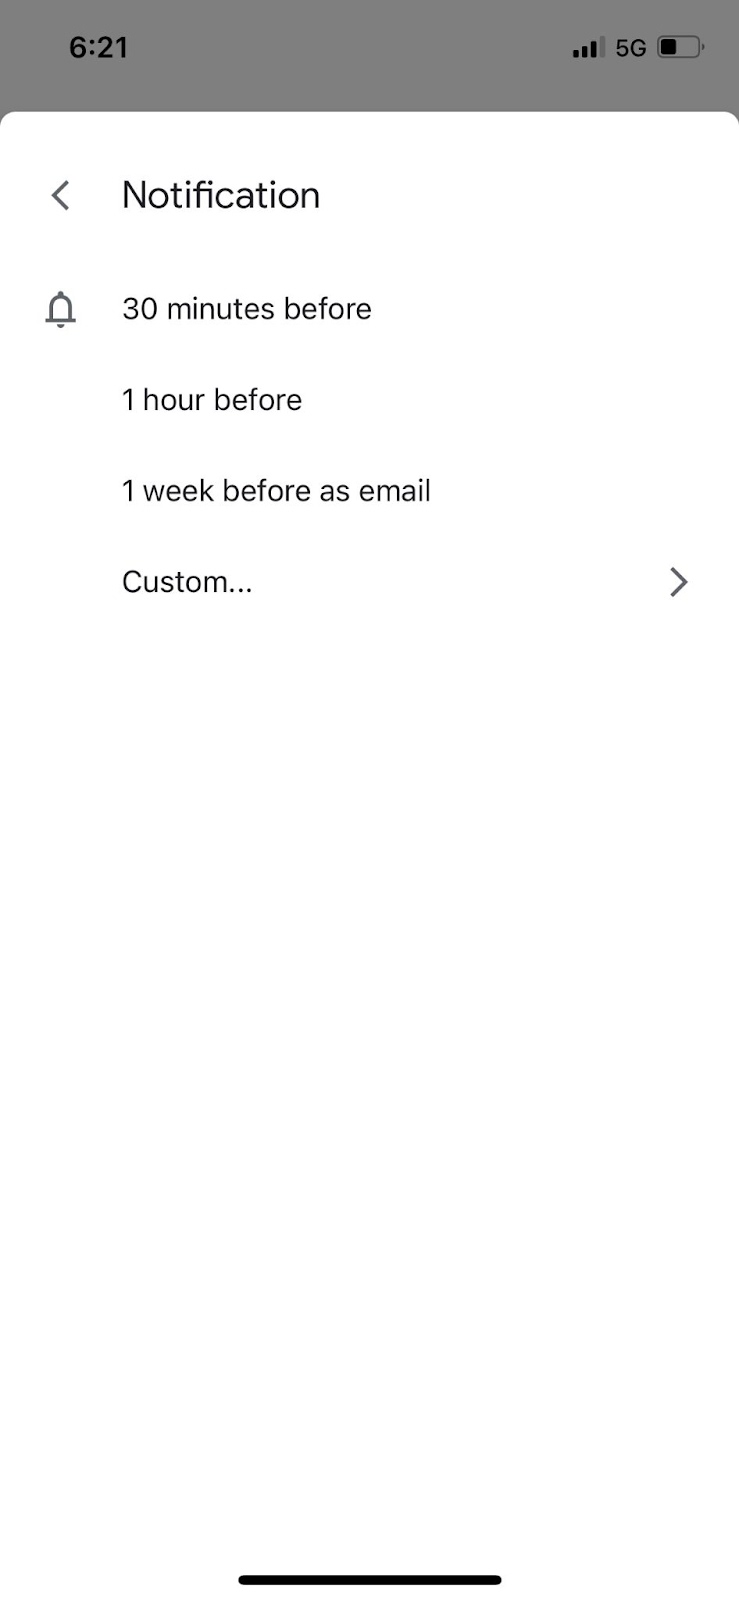
After you save your route to Google Calendar, you’ll see a drop-down menu that lets you add a notification for extra precaution (which will pop up on your iPhone, Android, Mac, or any other device you have Google Calendar on), or a Gmail reminder for minutes, hours, days, weeks, or months ahead of time. However, this isn’t 100% necessary to use since Google Calendar will automatically include the best time to leave, as long as you have your event’s start time, the mode of transportation you want to use, and you’ve chosen the route you want to take to your event’s location.
That’s it! You now have a new travel time event.
Bonus: Google Calendar tips
There are a few tips that can make your experience with Google Calendar easier, the most important ones for our purposes being keyboard shortcuts and automated events.
Did you know you can add keyboard shortcuts to make adding time travel to your Google Calendar more efficient? Here are some examples of some helpful keyboard shortcuts:
- Search: shift key plus /
- Choose a previous date range: k or p
- Choose the next date range: j or n
- Select today’s date: t
- Create a new event: c
- Delete an event: backspace or delete button
You can also set up event automation. If you know you have weekly appointment slots, for example, you can make that appointment repeat weekly without you having to manually create a new event every week. All you have to do is select the drop-down menu that says “does not repeat” and choose how often you’d like this event to repeat.
Going forward
As we navigate this new world of hybrid working, it’s more important than ever to protect your time so you feel accomplished without burning out and communicate efficiently with your team so that everyone’s on the same page. Travel time is, of course, just one piece of the puzzle that can help you with this, but an important piece nonetheless.
To start adding travel time to your calendar, schedule it manually using Google’s built-in feature, or automatically with Clockwise.
Read next: Set Working Location in Google Calendar


.gif)
.png)


