
If you often feel rushed throughout the day, adding travel time to your calendar can be a simple yet powerful solution. It’s one thing to mentally note how long it takes to drive from point A to point B — and another thing to actually block that time in your schedule.
In this quick guide, you’ll learn how to schedule travel time in your Microsoft Outlook calendar. Let’s start!
Benefits of adding travel time
Unless you’re using an AI-powered tool like Clockwise, adding travel time to a meeting does require a step or two. But here’s why it’s worth it for your time management in Outlook:
- Your calendar becomes a more realistic depiction of your day or week ahead
- You can better communicate your availability to your team
- It makes it easier to plan your day and manage your schedule
- It helps you avoid the stress of rushing or running late
- It helps you prevent overbooking yourself and potentially missing out on important opportunities or events
Now that we’ve covered the benefits of scheduling travel time, let’s talk about how you can do it in Microsoft Outlook.
Enabling travel time in Outlook calendar
Travel time isn’t a native MS Outlook feature. You can try a Microsoft Teams add-in like Emma.ai, which automatically adds travel time to meetings (but with no reviews on the Microsoft app store, we can’t exactly vouch for it). Instead, we suggest scheduling travel time as its own calendar event.
Below, we’ll guide you step-by-step in creating travel time blocks. We’ll also show you a few bonus tips to keep your calendar organized as you start to include travel time in your schedule regularly.
Adding travel time to a meeting
Blocking off travel time is easy once you get the hang of it! In fact, it’s a lot like your standard meeting scheduling process. Follow the steps below to schedule travel time in the web version of Outlook.
Step 1: Open Outlook calendar
Visit Outlook.com, log in, and switch to calendar view. You can do that by clicking the calendar icon on the left sidebar menu. If you haven’t already added your meeting to the calendar, do so now.
Step 2: Create new event
Make sure your calendar is set to Week view, then create a new event by clicking into the space right before your meeting. You can also use the New event button.
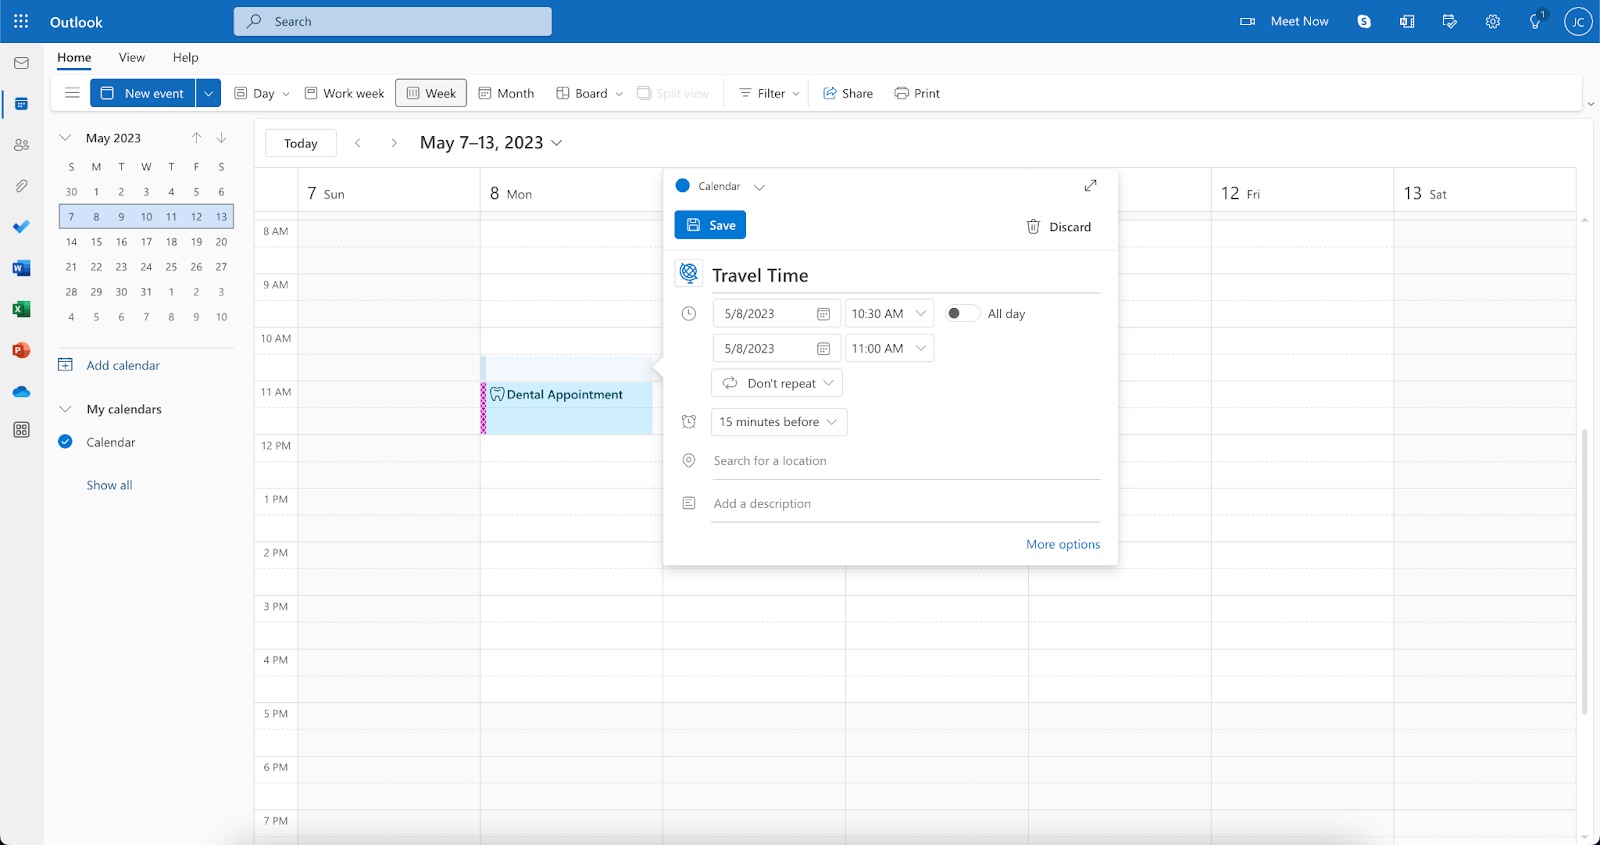
Step 3: Enter details
Name the event Travel Time. Adjust the start and end times if needed. You can use a navigation app like Google Maps to estimate how much time you should block off.
(Hint: Tack on a little buffer time for parking, traffic, or a few minutes to gather your thoughts before heading into your meeting.)
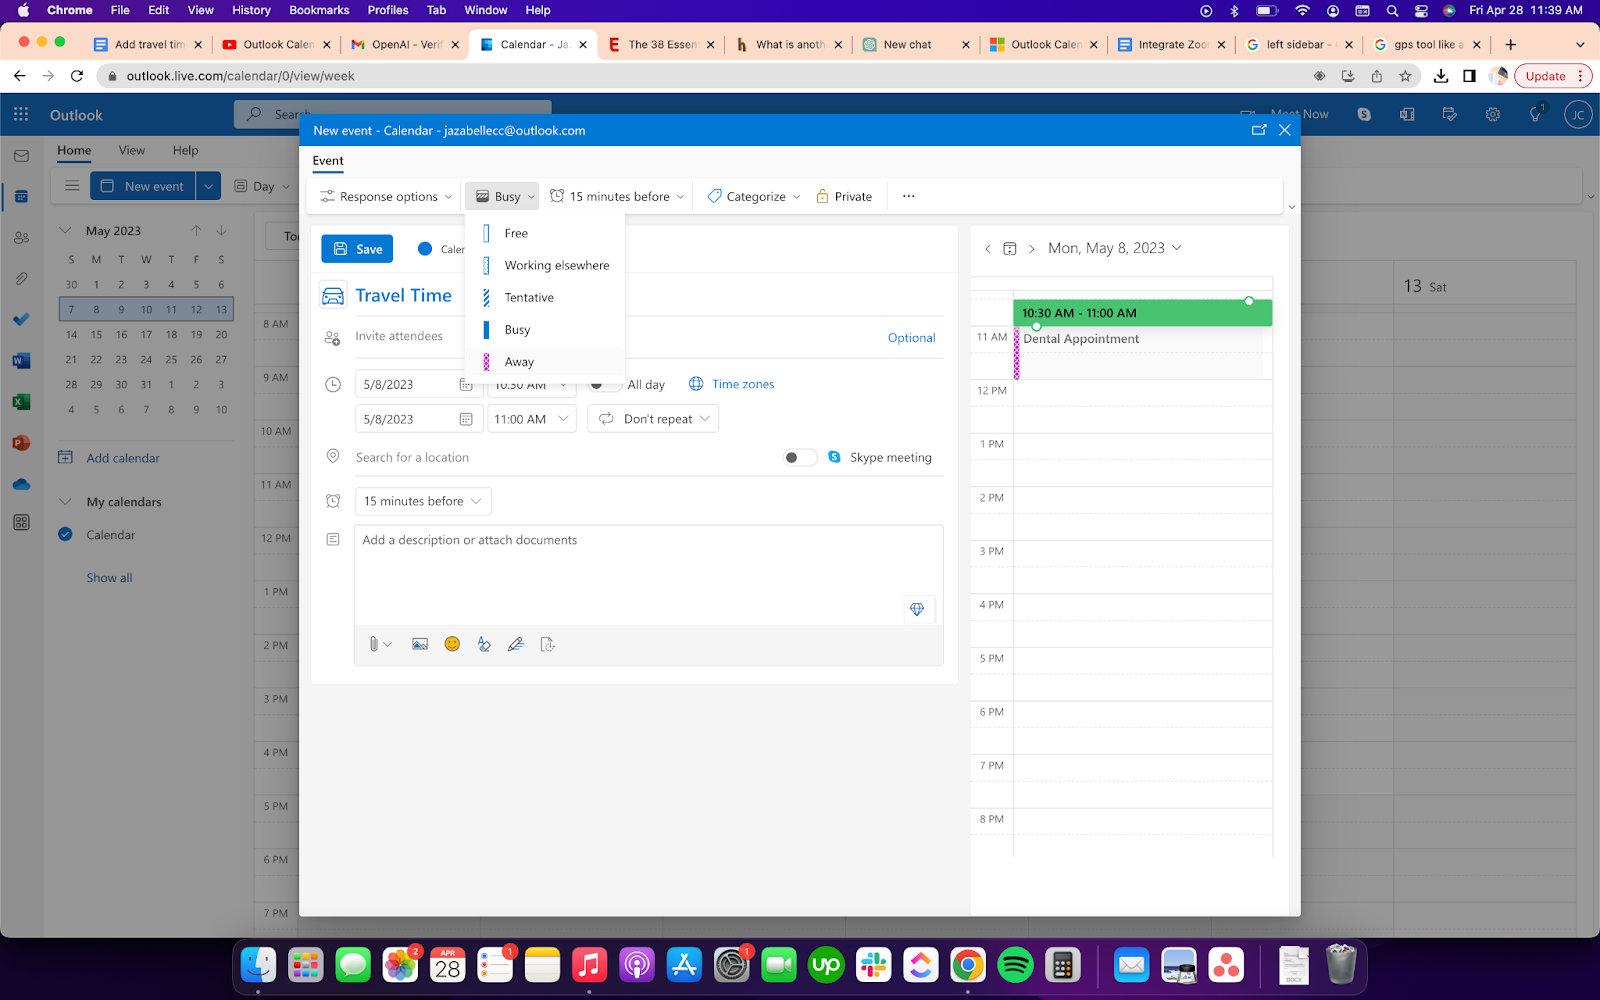
Step 4: Adjust “Show As” settings
Click on More options. In the top navigation bar, click Busy, then select Away in the drop-down menu. If someone tries to request a meeting with you during that time, they’ll see your “Away” status and know you aren’t available.
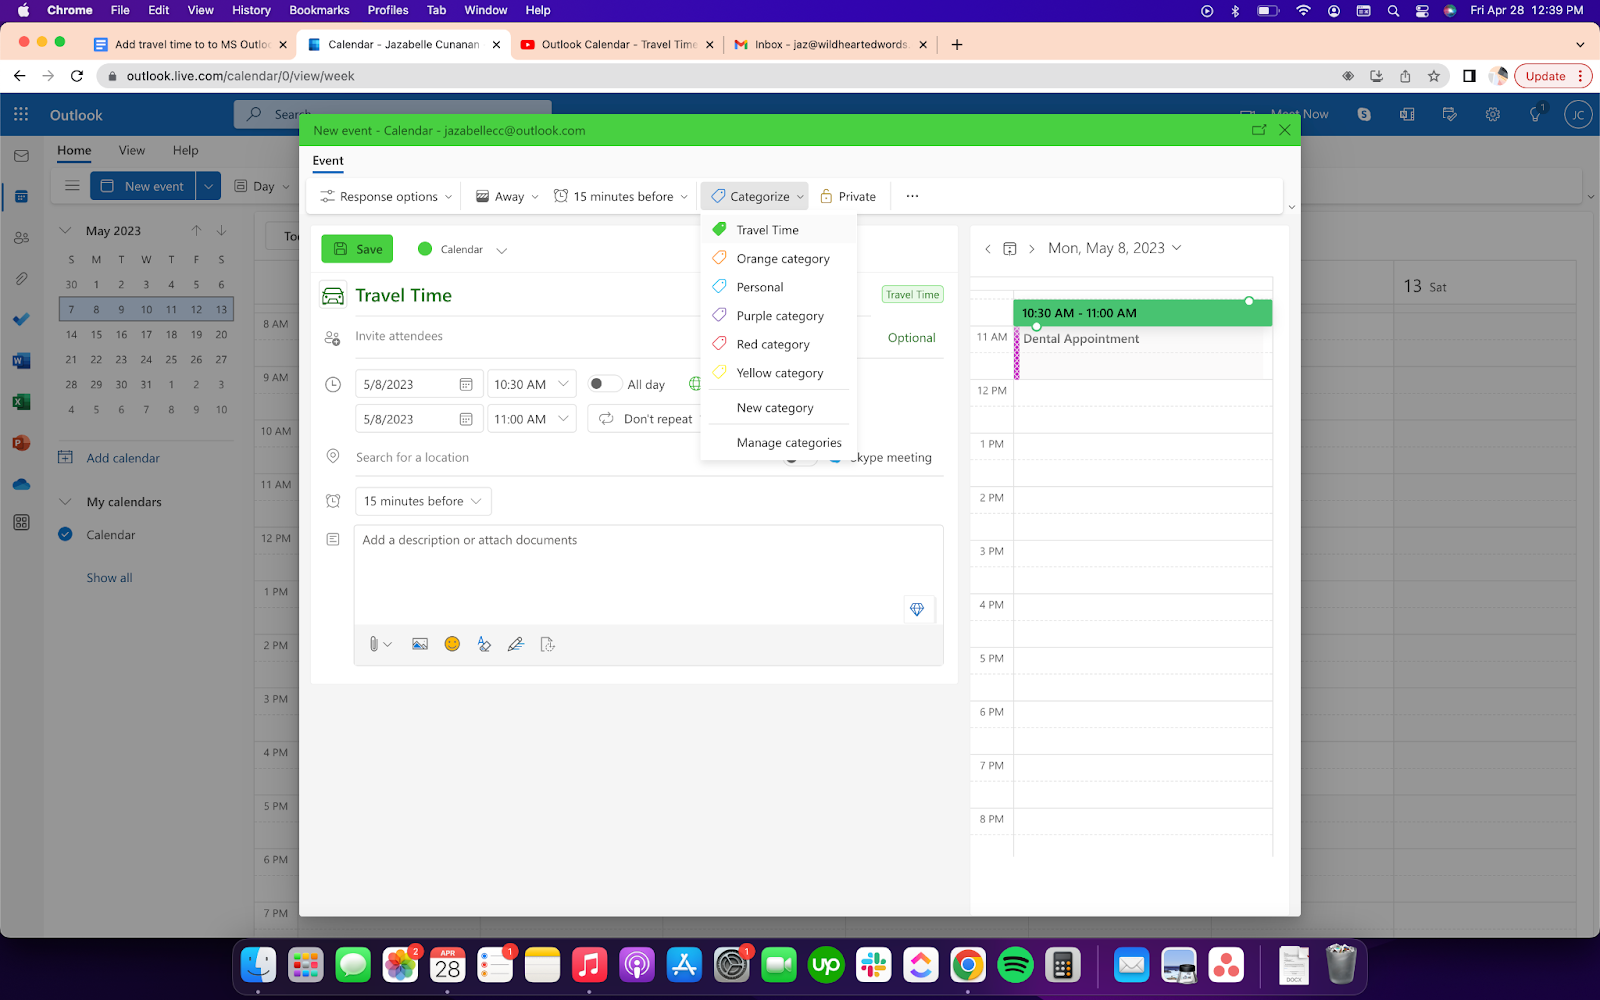
Step 5: Categorize as travel time
Click Categorize > Manage categories. In the Settings window that opens, create a new category dedicated to travel time. This assigns a color to all events categorized as travel time, helping your schedule to stay visually organized.
Exit out of the Settings window. Then, categorize the event with your new Travel Time label.
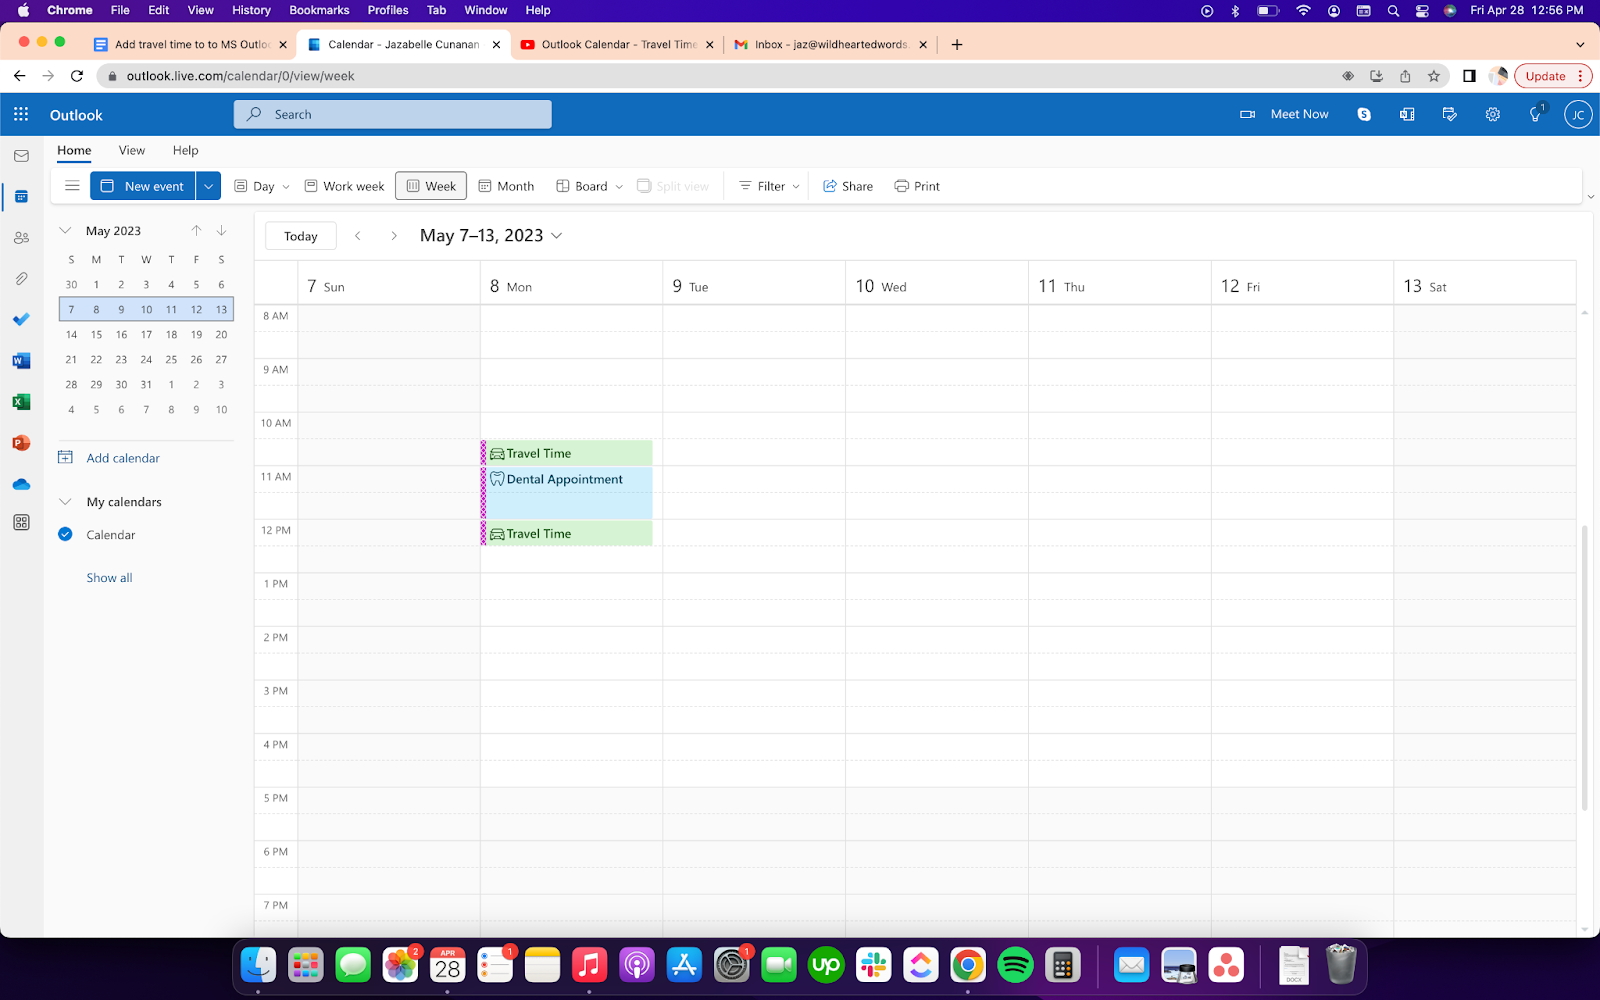
Step 6: Save your work
Click Save, and repeat this process to create a travel time block after your meeting, too. Voilà! You’ve successfully scheduled travel time. You should end up with something like this:
Tips and best practices to add travel time in Microsoft Outlook
- Assign a color category to travel time. Creating a “Travel Time” category allows you to color-code future travel blocks in just a few clicks. From then on, you can easily identify travel time on your schedule at a glance.
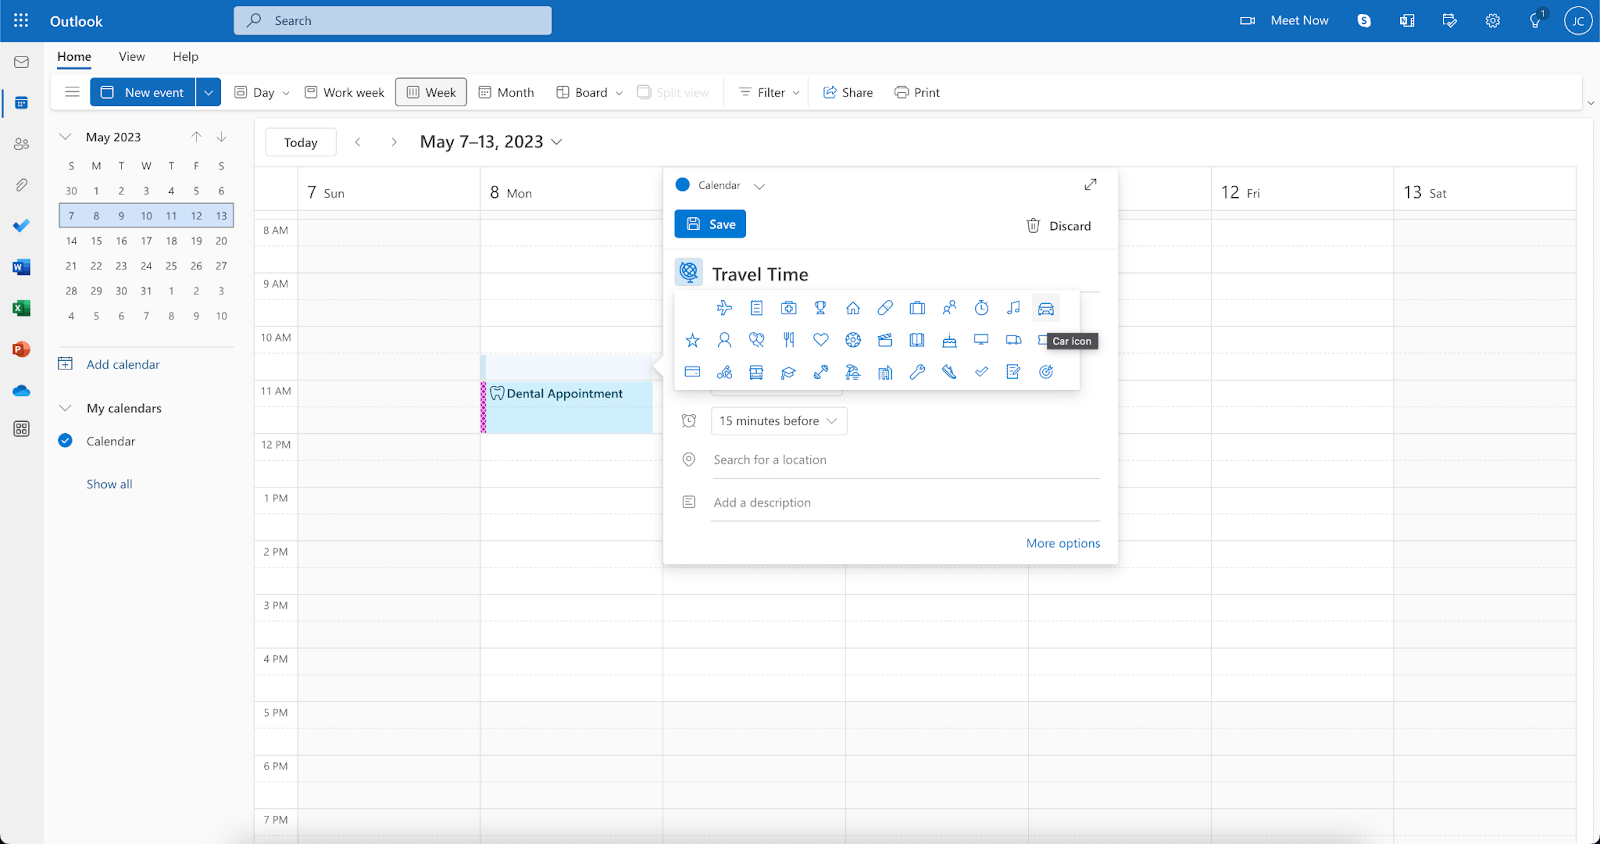
- Use calendar icons. Did you know you could add icons to your calendar events? Like color-coding, adding the car icon to travel time events makes it easier to scan your calendar and see what’s coming up. (It also makes things more fun!)
- Leverage the Show As setting. In this setting, you can specify whether you’re free, working elsewhere, tentative, busy, or away during a particular event. This lets your colleagues know your status during any given time, without necessarily giving away all the details of your schedule. For travel time, set the Show As setting to “Away” or “Busy,” so that no one tries to schedule with you during that time.
Going forward
Unfortunately, Microsoft Outlook doesn’t offer any features designed specifically for travel optimization. To schedule travel time in your calendar, you need to add it as its own event.
Not a fan of manual scheduling? Try Clockwise, which uses machine learning to identify meetings that require travel, understands how much time to block off, and automatically holds an intelligently determined amount of time on your calendar. Sign up for the Clockwise here.
About the author

Judy Tsuei is a Simon & Schuster author, speaker, and podcast host. She has been writing for Clockwise for several years while also being featured in MindBodyGreen, BBC Travel, Fast Company, Hello Giggles, and more. As the founder of Wild Hearted Words, a creative marketing agency for global brands, Judy is also a mentor with the Founder Institute, the world's largest pre-seed accelerator. Judy advocates for mental and emotional health on her popular podcast, F*ck Saving Face. Follow along her journey at WildHeartedWords.com.
.gif)
.png)


