.png)
Harvard Business Review conducted a study to examine how much time and energy workers waste when switching applications and context switching. They found that, on average, workers toggled between different apps and websites nearly 1,200 times per day, losing over two seconds per switch. That adds up to five working weeks in the course of a year.
Not only is the cost of switching apps adding up, but knowledge workers are using more apps than ever in the workplace. Research suggests that 76% of knowledge workers reported using more apps than five years ago, and 68% expect that number to increase.
Leveraging apps to do our jobs offers more benefits than drawbacks when managed correctly. And the good news is that many of our apps, like email, Slack, and Asana, work together seamlessly. With a few easy-to-use shortcuts, you can simplify your workflows and spend less time switching between apps.
In this how-to guide, you’ll learn:
- How to email tasks to Asana
- How to create Asana tasks using Gmail and Outlook integrations
- How to turn a Slack message into an Asana task
Email tasks to Asana in a few easy steps
Do you ever receive an email and think, “I should add that to my to-do list”? Maybe you add it to your note-taking app, jump over to Asana and add it to your tasks list, or write it down on a sticky note and hope you remember. (Guilty as charged on the sticky notes, by the way.)
There’s an easier way. You can create tasks in My Tasks and Projects in Asana via email. Here’s how.
Step 1: Check your email settings.
Don't skip this step if you’re part of more than one Asana Workspace or Organization. You’ll want to double-check your settings so that the email you send to Asana ends up in the right place. Only part of one Asana Workspace or Organization? Jump to step two.
In Asana, click on your profile picture in the upper right-hand corner and select “My Settings.”
Then, pop over to the “Email Forwarding” tab. This tab provides instructions on how to create tasks and messages using email and the settings for where your emails will create tasks and messages.
By default, your email will create a task in the Workspace or Organization associated with your email address. Adjust these settings now if needed.

Step 2: Head to your inbox and prepare to draft an email.
This is where the magic happens. You can create a task (or a message) by sending an email to Asana. Before we dive into the structure your email needs to follow, make a mental note that emails must be 30 MB or less.
Now here’s a look at how Asana will interpret your email and convert it into a task:
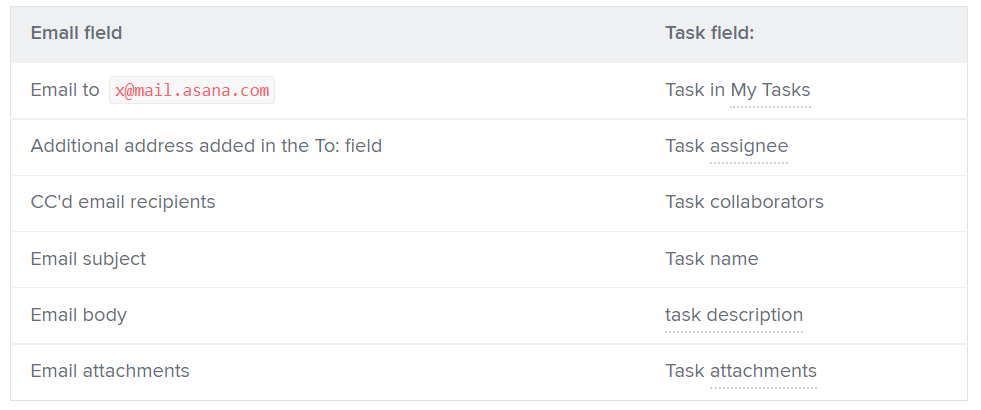
When you send an email to Asana, it will add it to the My Tasks list. Asana adds email addresses in the “To:” field as assignees to the task. If you only send the email to Asana, you will be added as the assignee by default. If you want to add collaborators to the task, include their email addresses in your email's “CC:” field.
The subject line and email body will become the task name and description, respectively. Any email attachments you include will attach to the task.
Step 3: Send your email to x@mail.asana.com.
Once your email is ready, send it to x@mail.asana.com. This is Asana's email address to convert your email to a task. Don’t alter the email address.
Here’s an example of an email I sent to Asana to remind me to finish writing this guide. I drafted the email so that:
- I’m the task assignee
- I don’t have any task collaborators
- I didn’t have any attachments to include
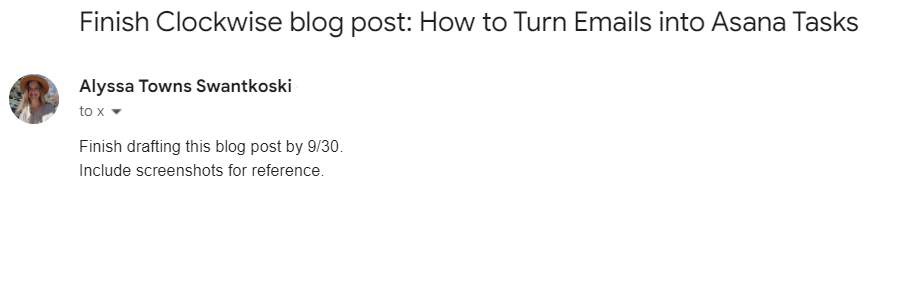
And how the task looks in Asana:

Step 4: Add a due date for your task and additional information.
Once your task appears in Asana, you can add a due date and any other information to the task that you’d like to include, such as a dependency.
And you’re all set!
Create an Asana task in a pre-existing project via email
You can also send tasks to specific Asana projects using the steps above; however, you’ll need to send your email to the project’s URL.
To find a project’s email address, open a project and click on the down arrow next to the project name. When the menu opens, click on “Import” and select “Email.”
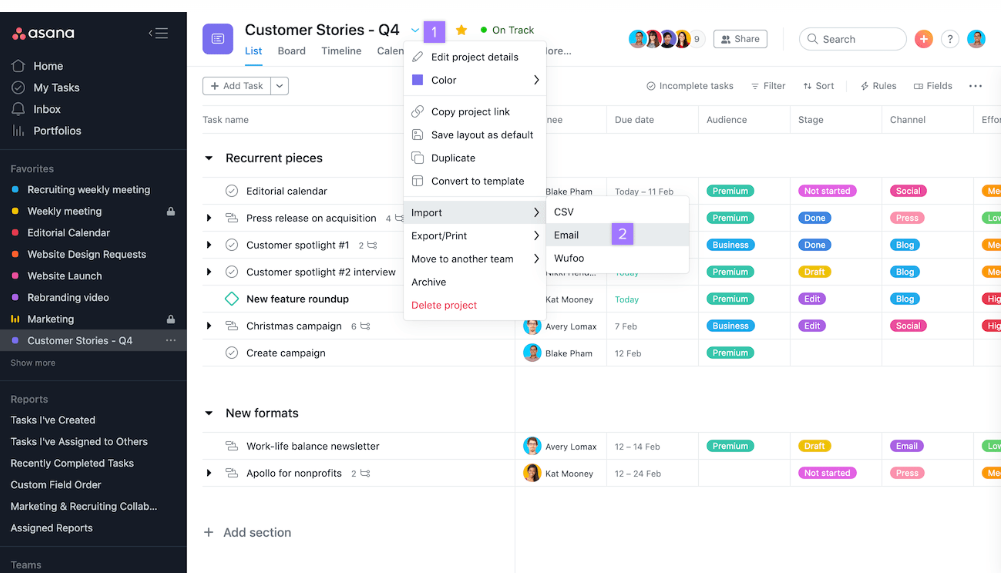
The email address for your specific project will appear like this:

Create tasks with Gmail and Outlook integrations
Here’s an even spicier shortcut: You can create tasks from your email inbox using Asana integrations.
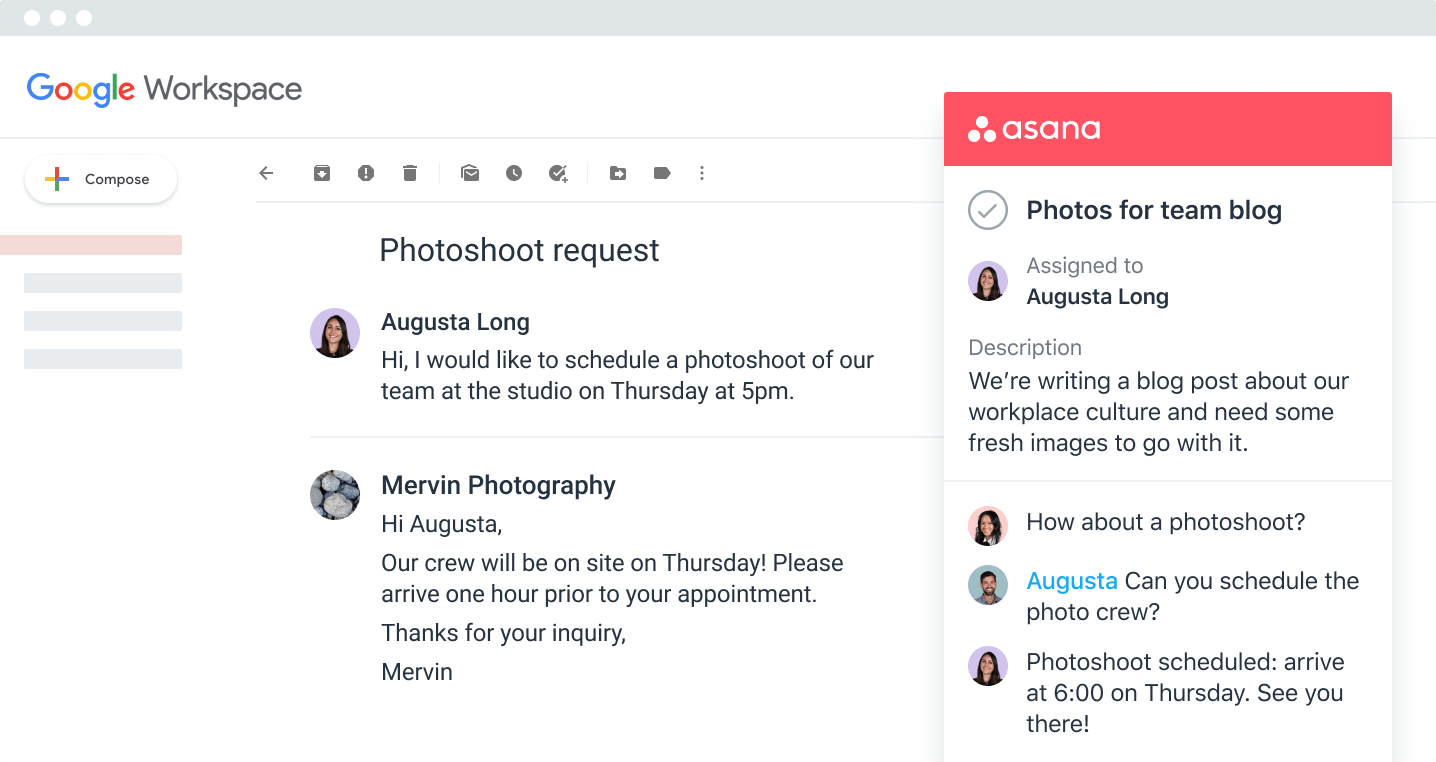
Gmail users: Download the Asana for Gmail add-on from the Google Workspace Marketplace. Once you connect your Gmail and Asana accounts, you can use the add-on in the right-hand panel to create and search for Asana tasks from within Gmail. Tasks you create from Gmail will include the context from your email.
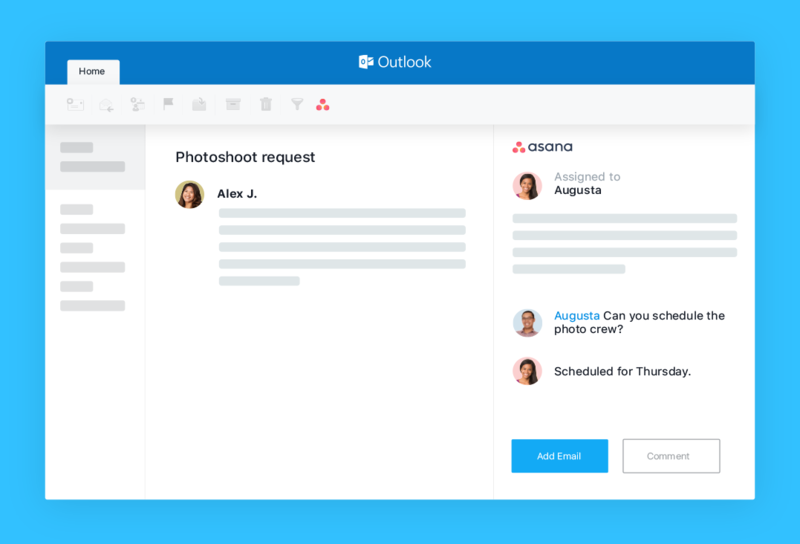
Outlook users: Go to the Microsoft Marketplace and add the Asana plugin to your Outlook inbox. (Instructions may vary depending on your organization’s settings and permissions.) Once you download the plugin, you can create tasks using the buttons with the Asana logo in the top bar of your inbox. The side pane opens so you can create new tasks or attach your emails to existing tasks.
Turning Slack messages into Asana tasks
You need to know one more trick for a seamless workday. The Asana for Slack integration allows you to turn Slack messages into tasks with just a few clicks. You can act on previously created tasks or create new ones in Asana without leaving Slack.
It’s simple. First, download the Asana for Slack app and follow the prompts to authenticate your Asana account (thank you, Slackbot).
Once your accounts are linked, you can turn Slack conversations into tasks or add the conversation to a task. To do this, select the conversation and click the “More actions” button in the right-hand corner. Then select “Create a task” or “Add as task comment.”

When creating a new task, you have the option to add:
- The task name
- Assignee
- Project
- Due date
- Description
When adding a task comment, a dialogue box will prompt you to search for a task and add a comment (either the Slack message written as is or a custom comment you add).
Additional resources
- Using other project management tools? Try the Zapier app for Slack.
- Clockwise: Leverage the power of an intelligent calendar assistant and try Clockwise for Slack.
- Add Asana tasks to your calendar with the Clockwise + Asana integration for more efficient time management and task planning.
About the author

Alyssa Towns has written productivity and time management content for Clockwise for several years. Early in her career, she dove into time management strategies to effectively manage her workday calendar and 10+ C-Suite officers' calendars across various organizations. She uses her training in change management to write time management, the future of work, and career content that helps people change their behaviors and habits. In addition, she writes about artificial intelligence (AI) and other technology for G2's Learn Hub. When she isn't writing, Alyssa enjoys trying new restaurants with her husband, playing with her Bengal cats, adventuring outdoors, or reading a book from her TBR list.
.gif)
.png)


